Showing posts with label software. Show all posts

Friday, December 30, 2016

GUI Software Review ImageWriter

So over the last year I've really gotten into my Raspberry Pi. If you've never heard of a Raspberry Pi it's a tiny computer that costs under $50.00. It's not super powerful but it's perfect for running small tasks like stake mining cryptocurrency or running a bot on twitter. It's also a low power consumption device, making it the perfect device to run 24/7 without running up the power bill. The best part is it runs on a debian based operating system.

I've been using mine for staking OKcash cryptocurrency and also running a bot on twitter. My cousin got me the latest model the Pi 3 for Christmas and I needed to get it set up. The Pi utilizes a micro SD card for a hard drive and I needed to image the SD card with the ROKOS operating system. Which brings me to what this post is all about.

The last time I tried to do this using my OpenSuse laptop I had disastrous results. I don't know what I was doing wrong but something kept corrupting the disk image. I ended up using a friends Windows computer to get the job done. The shame! It doesn't happen often but occasionally I will resort to a Windows PC. That wasn't an option this time, but I found a great little program that was easy to install, easy to use, it's GUI and it got the job done. The program is called ImageWriter and it will image a USB drive or SD card quickly and effeciently. As far as I know it's available in most repositories.

apt-cache search imagewriter
zypper search imagewriter

So I found the program in my repository and installed it.

zypper install imagewriter

Once it was installed I found it in my application launcher in the utilities category. I opened the program and was thrilled with how easy it was to use.

1) Open the program
2) Insert the USB drive or SD card. The second it's inserted ImageWriter recognized it.
3) Click on the square in the center of the program.
4) Go to the directory with the image that needs to be burned and select it.
5) Write image to disk.
Click on the square to select the image to burn,
Select image.
Click write and wait for progress bar to reach 100% and disappear.

That's it! You're done! Simple, easy, and fast. Fantastic program.  The only weird thing about it is that the progress bar gets to 100% and just disappears. There's no message that reads, "Job complete" or "Write Completed" no system bell, beep or other notification. It just disappears and you're sort of left wondering if it's really finished.


Thursday, January 30, 2014

Software Review Posterazor For Printing Posters

Here's a quick, easy way to print out posters from your computer. Posterazor is the perfect software solution for poster printing. If you've used The Rasterbator online, this is pretty similar but you don't have to be online to use it. Now you can print out great looking posters from home, the office or anywhere you don't have an internet connection.

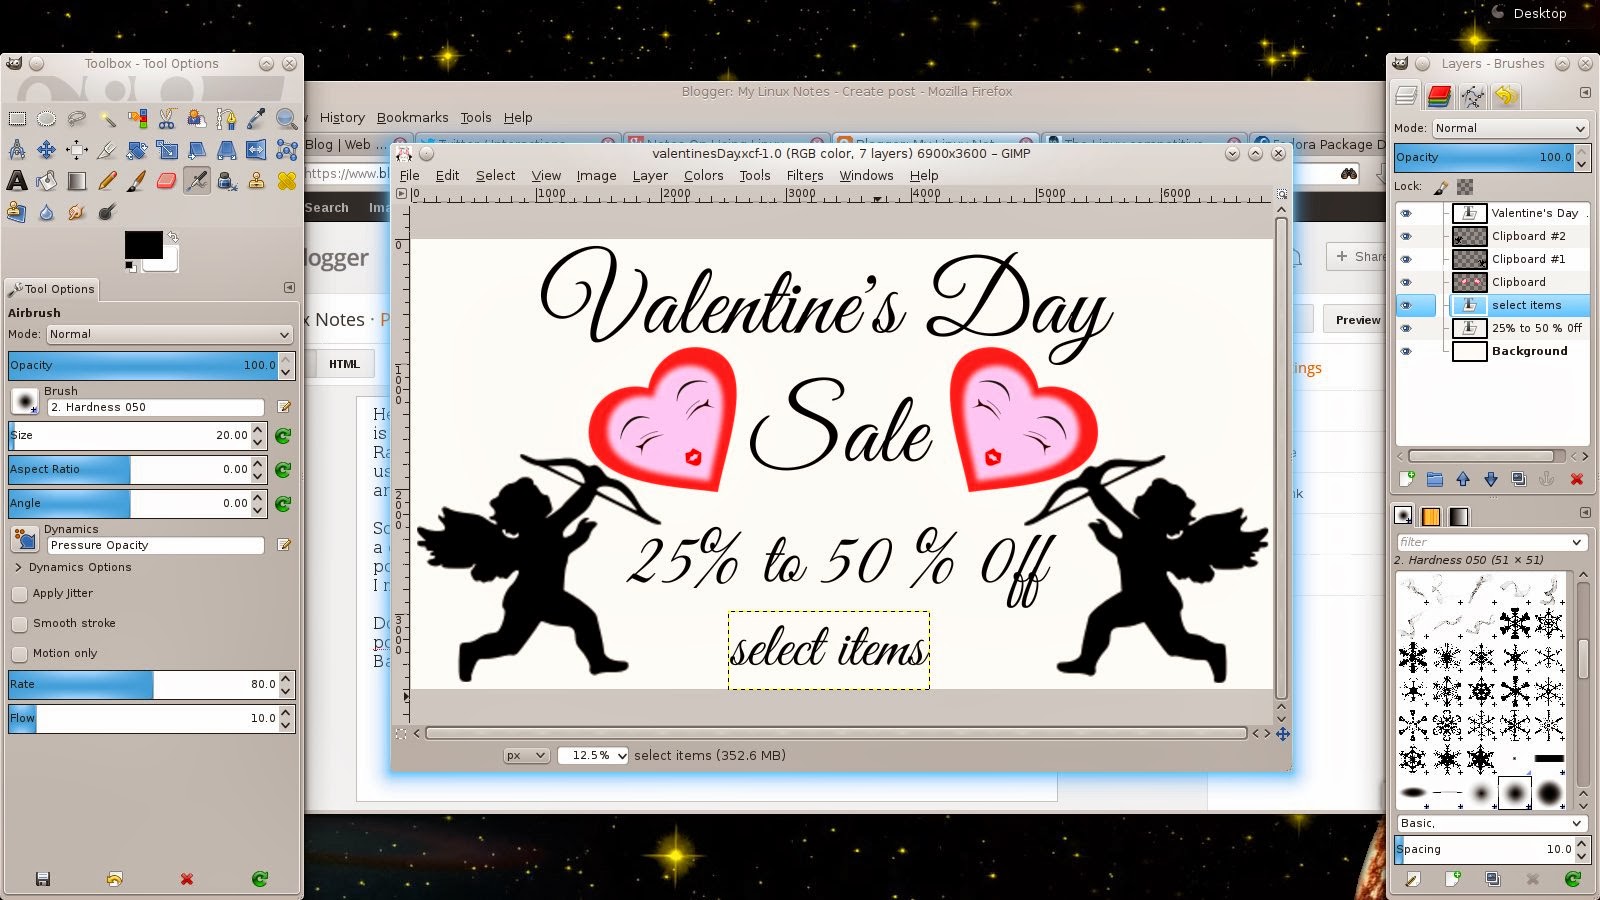
So I use this personally for promo posters for my business. I have printed out a couple decorative poster art type projects, but my main use is for window posters to promote sale items. This program lets you print out an image over multiple pages of paper so you can tape or collage them together to make one large poster. Here's an example of a Valentine's Day poster I made for a friend.
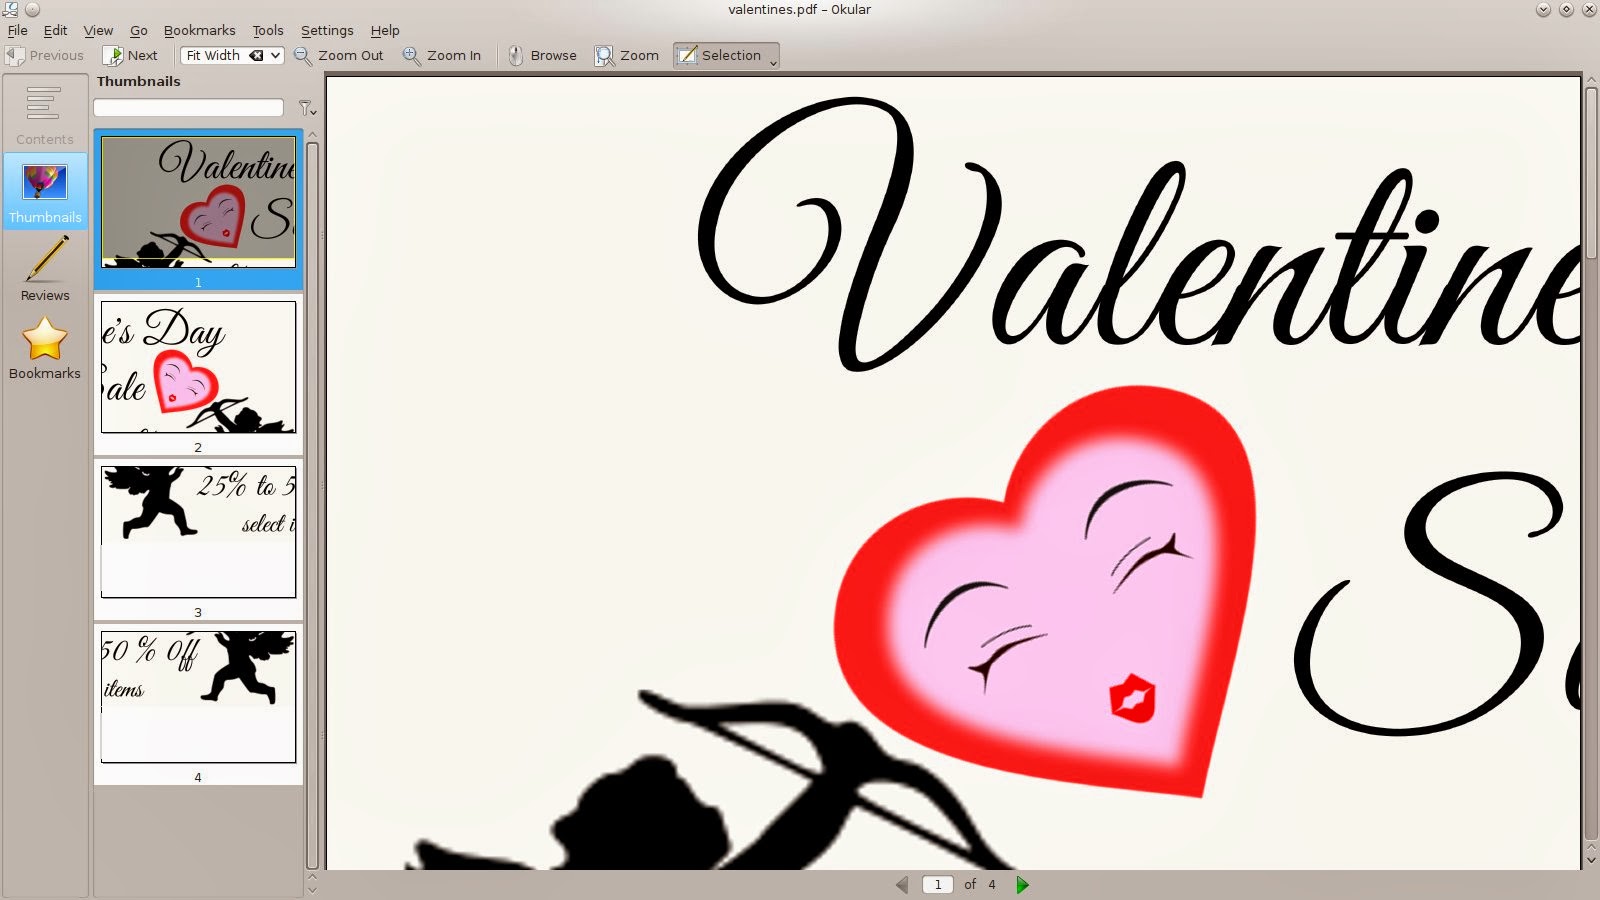
Valentine's Day sale poster made with some clipart, and 4 pages of paper.

I use Fedora so I did  a yum search and I found it available in the repositories. yum install posterazor and yum did the rest. Using the program is pretty simple as well. Basically for my project I created a 6900 x 3600 pixel file in Gimp 2.8. Chose my font, added some clipart and exported the file as a jpg image.

Designed in Gimp 2.8 at 6900 x 3600 pixels and exported as jpg.
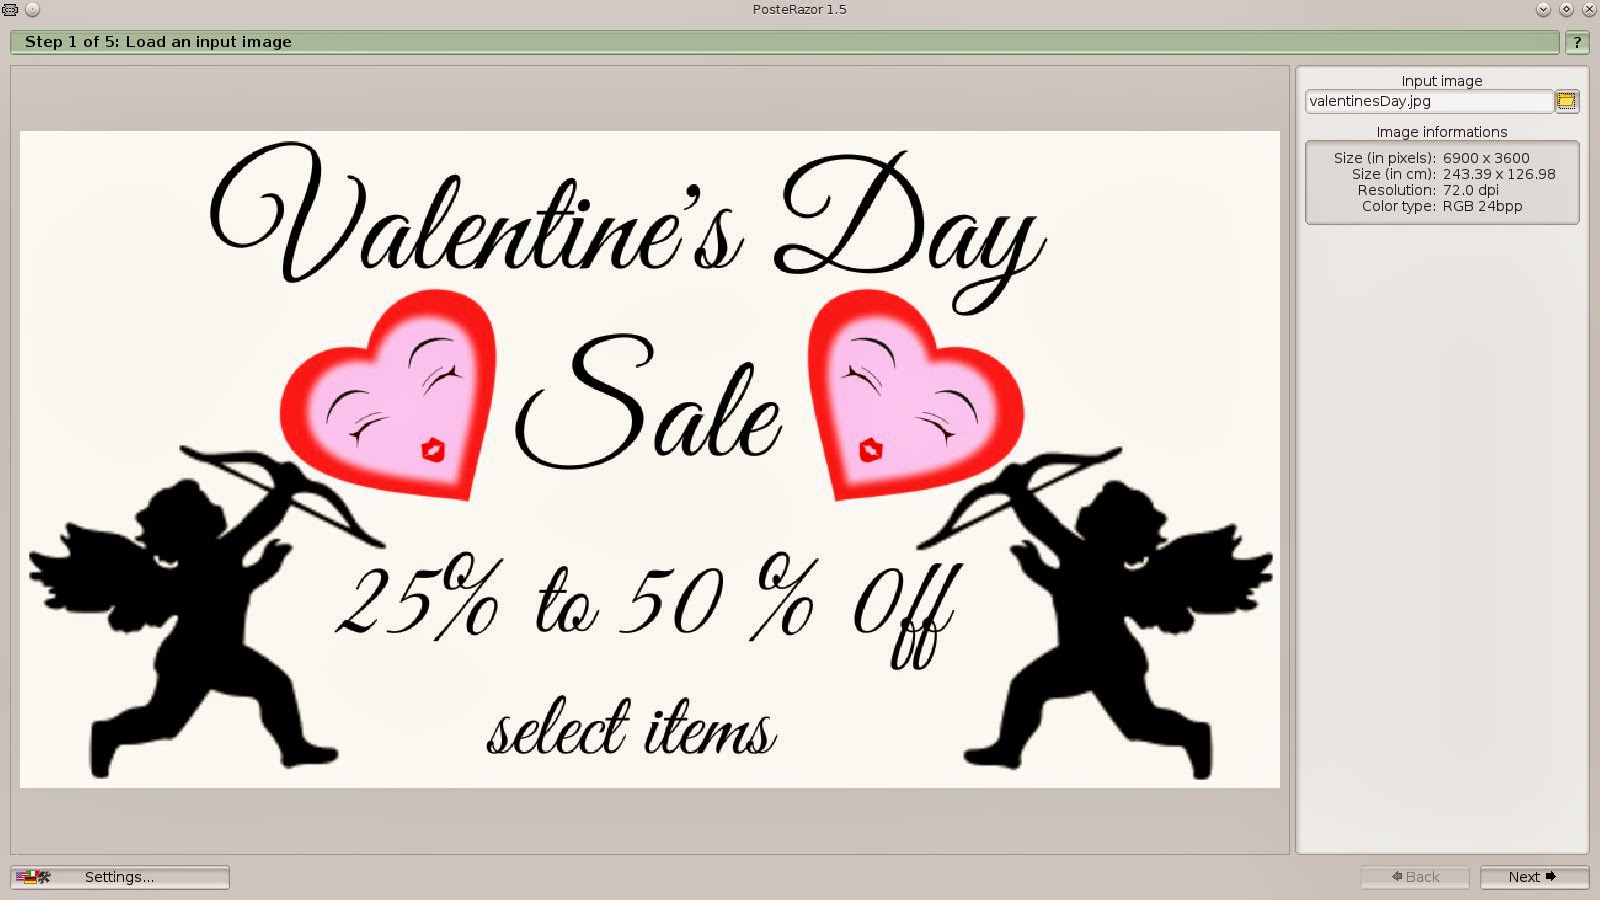
 Next you open Posterazor.Click on the folder icon over on the right hand side where it says input image. Find the directory where you saved the file you created and open it in The Posterazor, when the file opens click the next button over on the bottom right hand corner. You can click the images in this blog post to enlarge them for a better view.

Step 1 of The Posterazor. Select the image you want to turn into a poster.
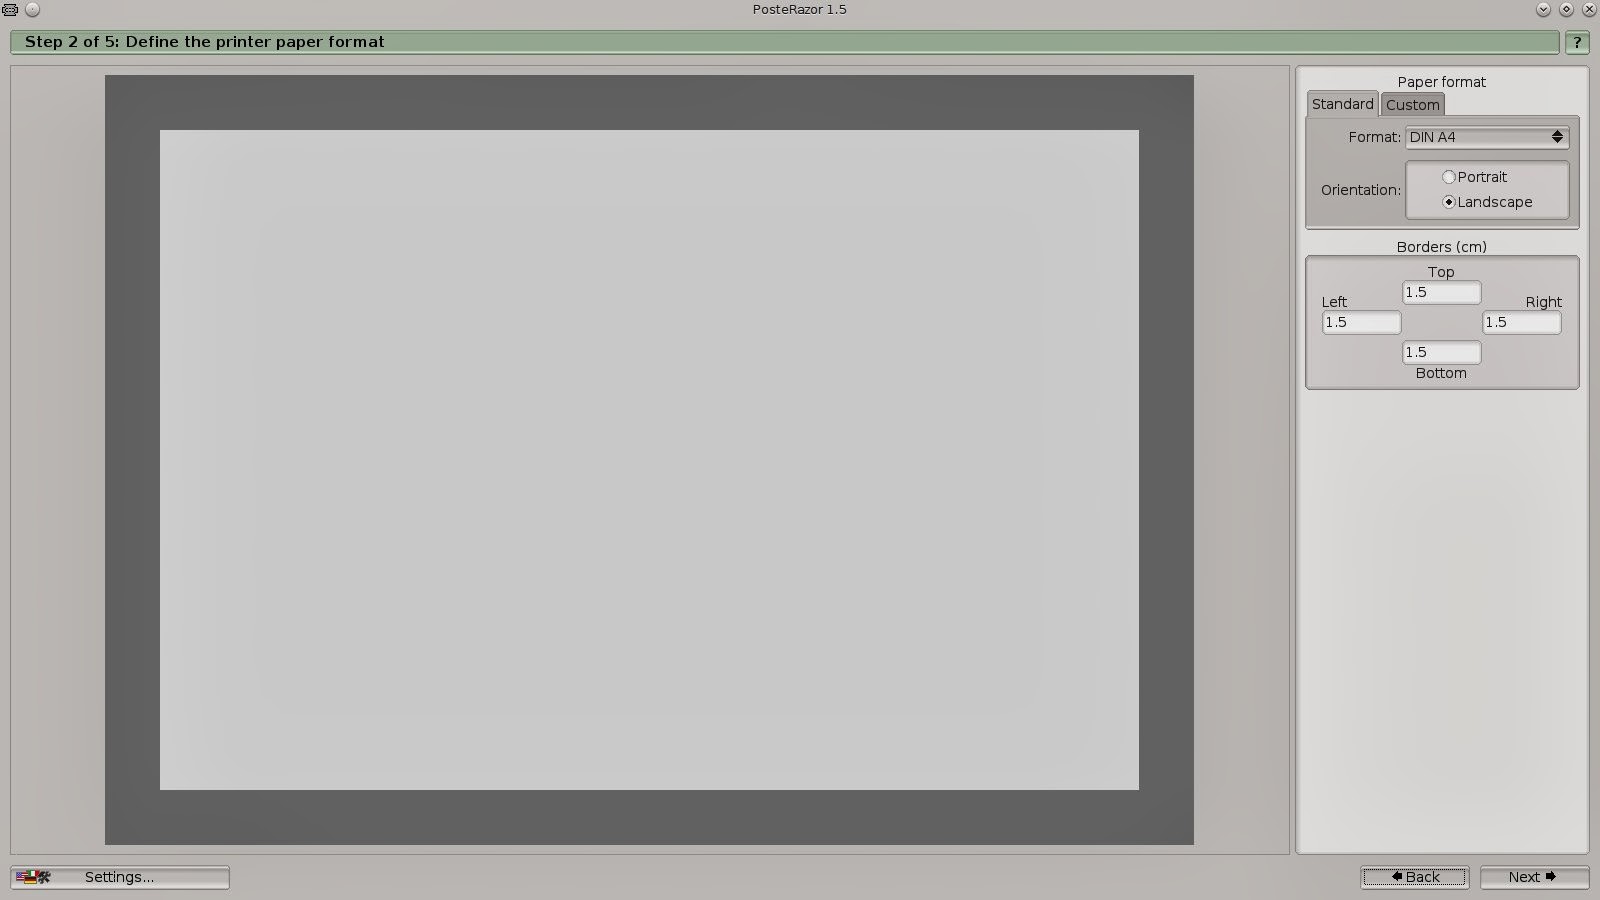
 During step 2 I kept everything on the default settings. This more or less controls your borders. You can play around with this a bit on your own. I just left it at default and cut the borders on one page so they overlapped a bit and had some room to tape. I found this easier for me. Again click next.

In step 2 I left everything set at the defaults.
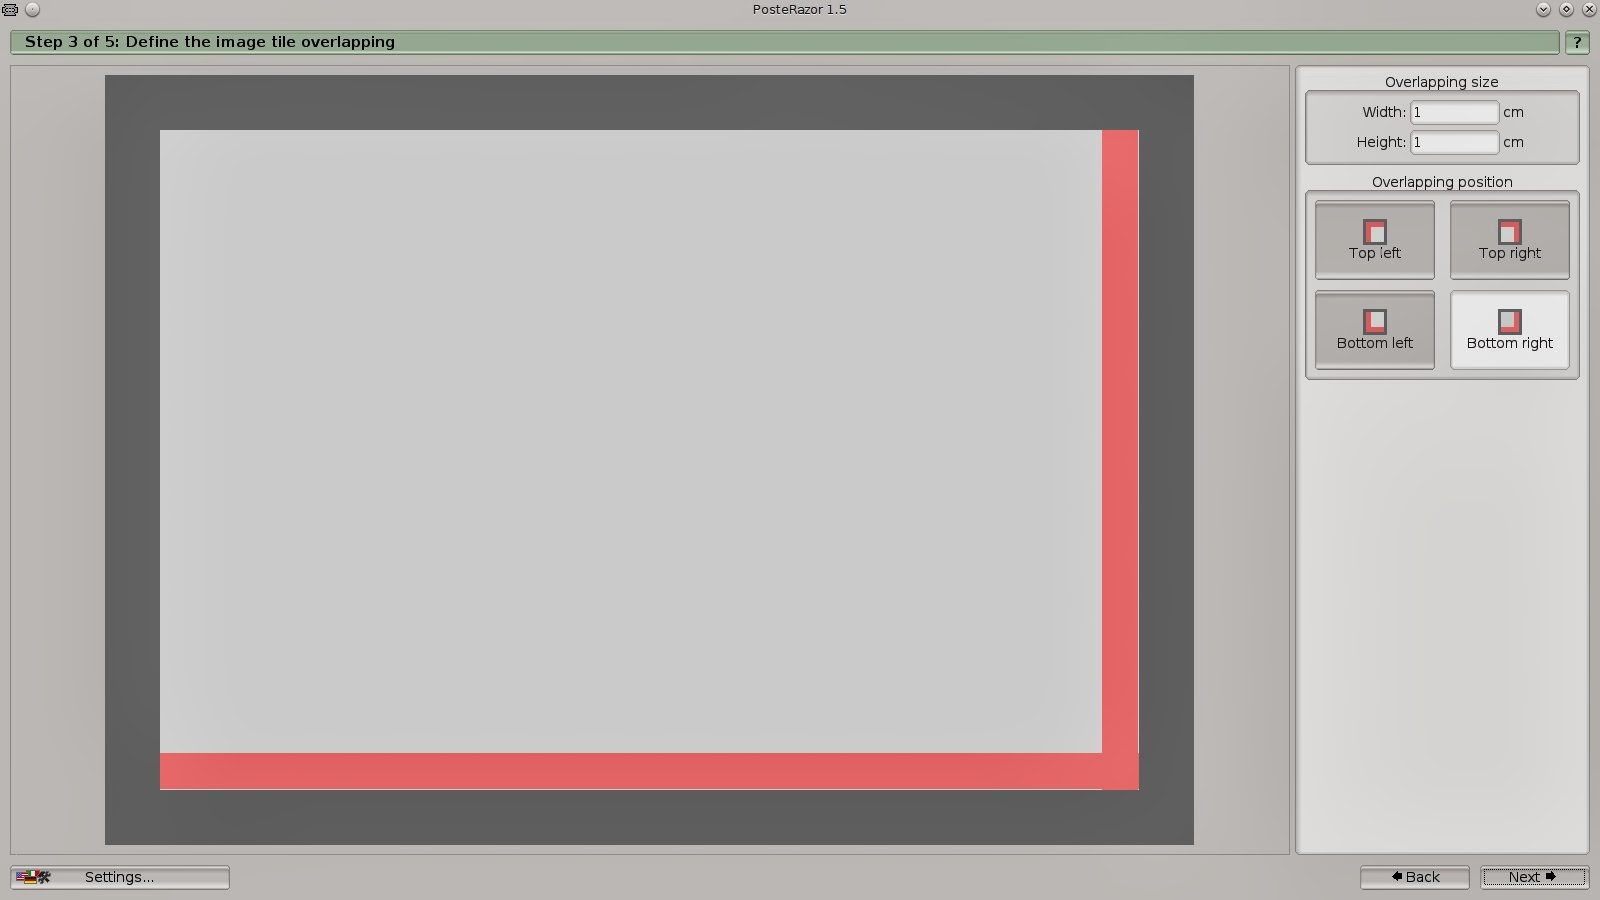
Step 3 lets you adjust the overlapping of the pages. Again I left this on the default setting and clicked next.

Step 3 controls the overlapping, again I left this set at the defaults.

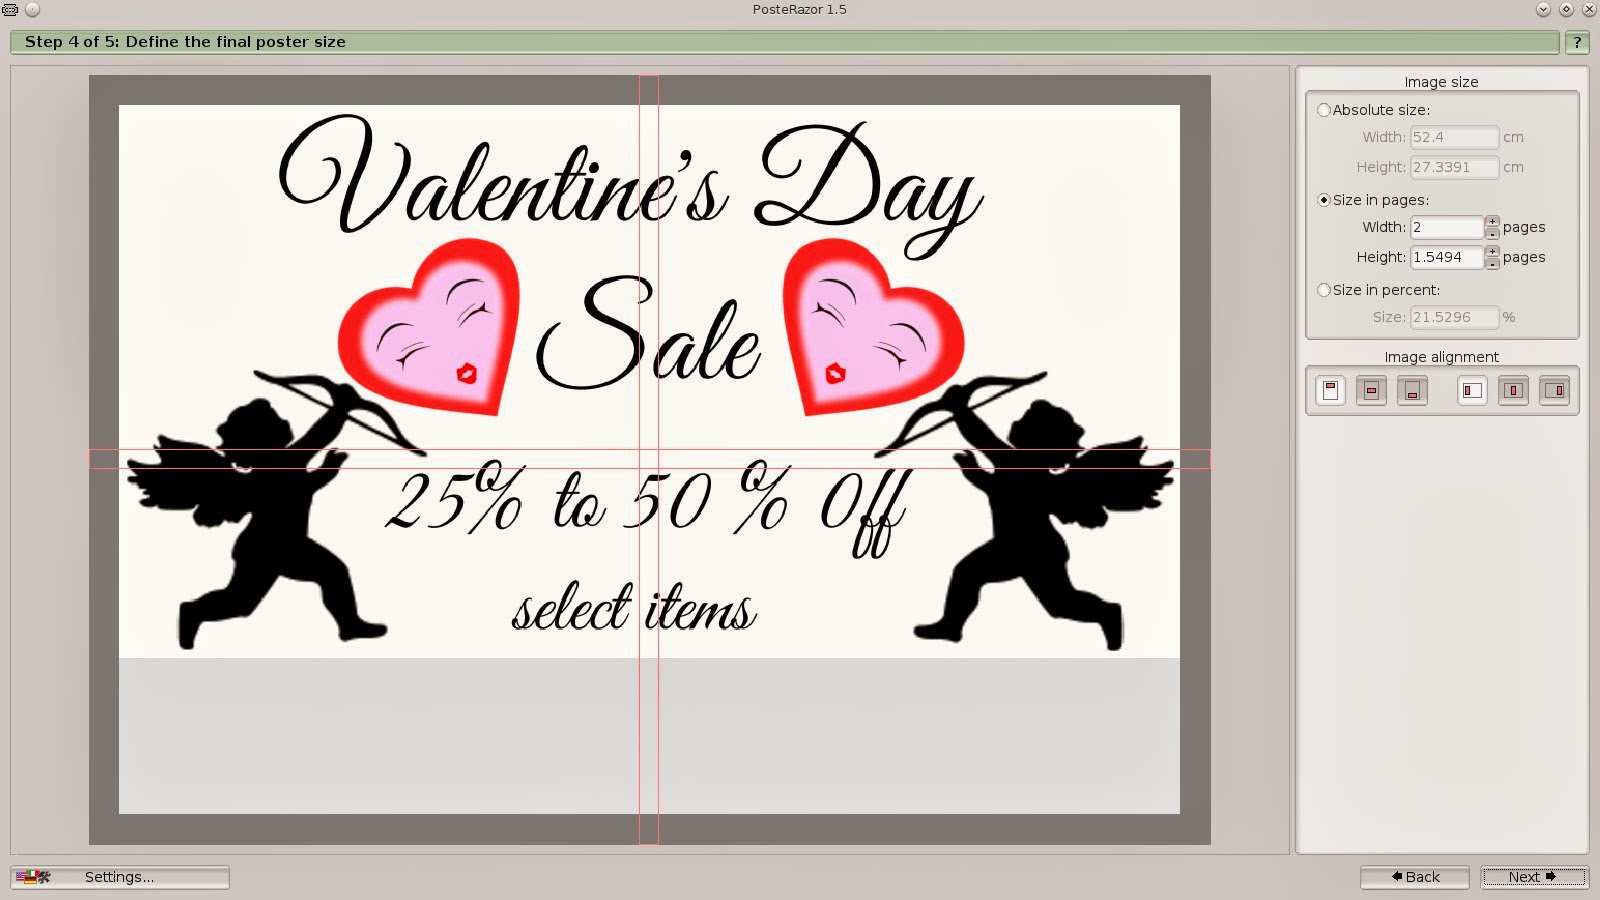
Step 4 shows you how the pages will print, and how many pages you will be using. You can adjust this to make your poster larger or smaller. I wanted mine to be about 4 pages, landscaped, to place in the storefront windor. So I created it at 2 pages width, and 1.5 page height. Click next.

Step 4 shows you how many pages you'll be printing. This can be adjusted to add more or less pages depending on the size of the poster desired.
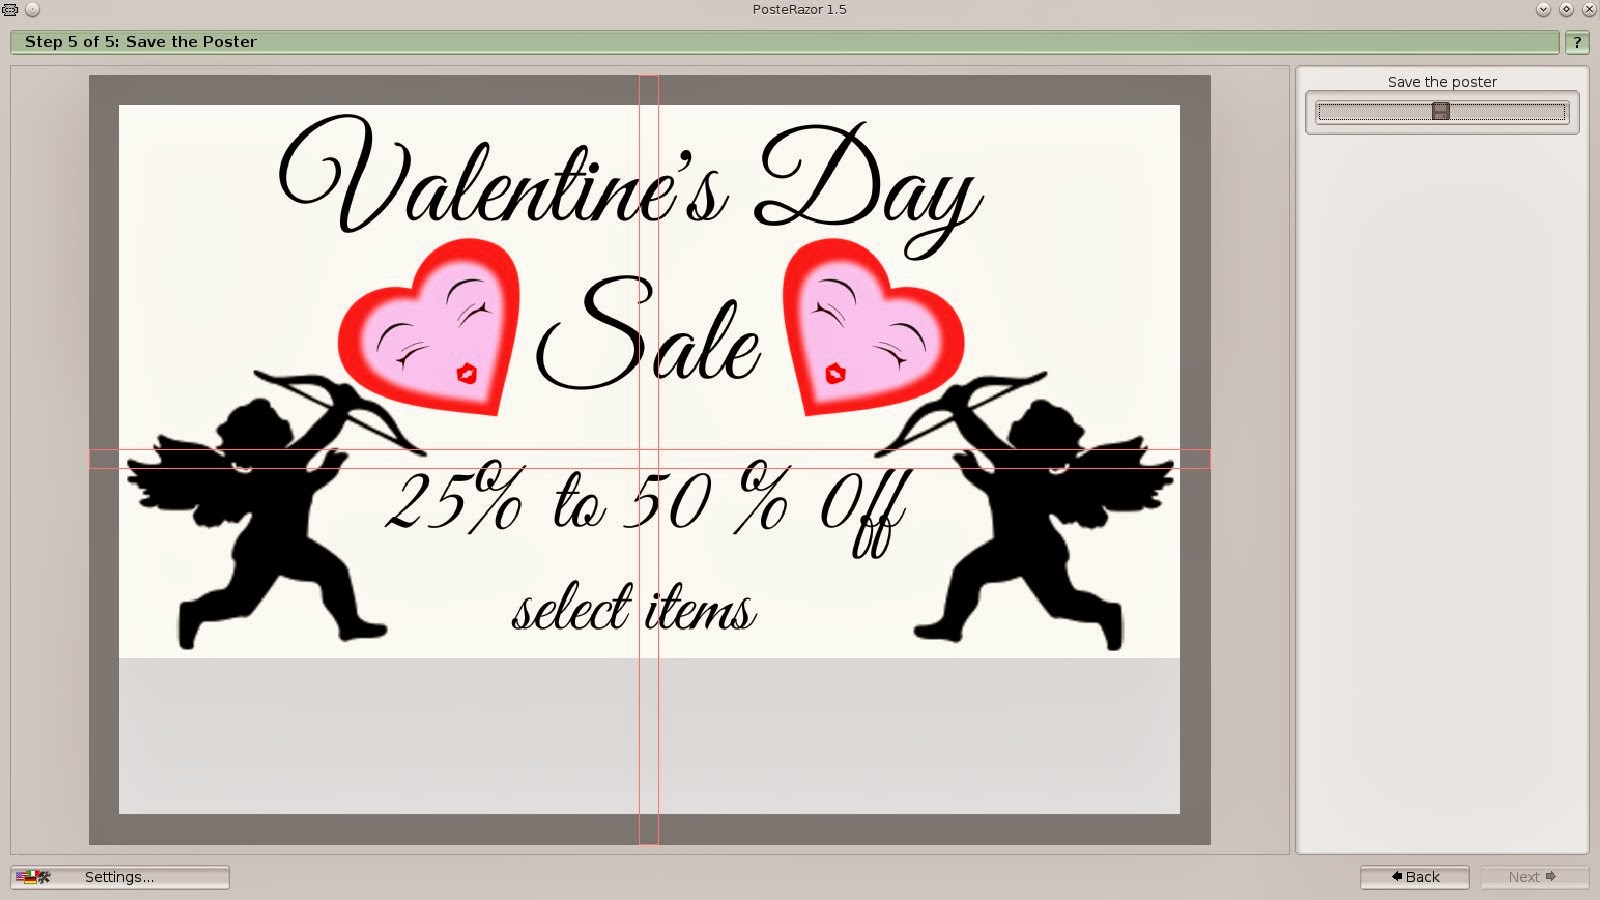
 Step 5 click on the floppy disk icon under where it says save the poster. Choose the directory you want to save it in, name the file and give it a pdf extension. Press the OK button and your pretty much done.

Click on the floppy disk icon, name the file and give it a pdf extension.
All you have to do now is open up the pdf file, click print, and your printer will do the rest. Trim the edges, I trim the edges on one side and tape it on the back. I think it looks neater and hides the tape for the most part.
Open the pdf file in your favorite pdf viewer. I used Okular. The image will be broken up in page sections. Click print, and tape your pages together, you have acheived poster !
Whatever you decide to use the Posterazor for, this is a great piece of software, that's fun and easy to use. Makes great posters in 6 easy steps ! This is perfect for creating promo posters for the store window at work ! If you've used this program leave a comment and tell me what you've used it for.

Wednesday, April 24, 2013

Format USB Pen Drive With Gparted Linux GUI

I've had a pen drive for a couple years that I use regularly. It always comes in handy, and gets used often. Last night I decided it was time to remove all the data and wipe the drive. I started fumbling around in the command line looking for my USB pen drive and realized that there had to be an easier way to accomplish this task. Then I thought about Gparted. Gparted is a great program to use when you have to re-partition your hard drive or any partitioned device. It's a GUI and works great.

I did a yum search gparted, and found the program in the repositories. I installed the program using yum install gparted. Yum did all the work and gparted was installed. I opened my system folder, found the link for gparted, and opened up the program.

Before you open Gparted you have to plug in your USB pen drive. Once you open Gparted it will ask for your password, and then it will search for any partitions on the system. In the upper right hand corner of the program you want to click on the /dev/sda drop down menu and find your USB pen drive. On my system it was found on /dev/sdb select it by clicking on it. In the main part of the program you will see the partitions listed for your USB pen drive. On mine I had a 3.81 Gib partition, and a 14.23 Mib partition. I'm pretty sure you want to leave the smaller partition alone as this loads the device or makes it recognizable in any system you plug it into. I clicked on the larger 3.81 Gib partition listed as /dev/sdb1 on my system and then clicked on Partition , Format to, Fat 32. And Gparted formated the drive quickly.

If you want the drive to be interchangeable with windows machines I strongly suggest the fat32 format option. That's it, all done, I now have a wiped USB pen drive, all the old data is gone, and I now have a clean USB stick to use again hopefully for many more years to come.

I always use Gparted for any partition work I do on my drive. The program is a really easy to use GUI and once loaded it's almost self explanatory. I'm going to be making some changes to my system soon, and will be using this program for some future projects. I'll be posting more on this fantastic tool in future posts.

Sunday, April 21, 2013

Convert flv clips to mpg and Combine To Make One Long Video.

I had a ton of flv files on my computer and I decided I wanted to convert them to mpg files and then combine them to make a large compilation video. Each video was approximately 5 to 15 minutes in length and I wanted one complete video that ran a little over an hour. Here's what I did.

I found two programs that run from the command line that were perfect for the task at hand. The first program I found was FFmpeg, this program is capable of taking the flv file and converting it to mpg or avi, and I think a couple other formats as well. The other useful program I found was mpgtx, this program is capable of taking multiple mpg files and then combines them to make one giant video file.

It's important to note both these programs have other uses, and I'm barely scraping the surface of what these programs are capable of with this post. However, if your looking to accomplish the same type of project this short post should at least get you headed in the right direction.

Using Fedora I downloaded both programs using yum.

su
yum install ffmpeg


and then

yum install mpgtx.

Yum found the programs, found the dependencies, and installed with no problem. I believe both these programs are also available at sourceforge.net

I then created a directory in my Videos folder and named it project, I copied my flv files that I wanted to work with to that directory. Then using Konsole I went to that directory.

cd username/Videos/project

I then attempted to convert the files with ffmpeg. The first attempt I made was using the basic commands and settings. The program worked great but the video was a bit grainy. FFmpeg is very verbose while it converts the files so I looked at the files pixel size, and then decided to do an exact copy of the video and sound which fixed the image quality but made the video choppy. I then did a bit of research and settled on :

ffmpeg -i filename1.flv -target ntsc-dvd -b 2000k -acodec mp2 -ar 22050 -ab 64k -aspect 4:3 filename1.mpg

For the sake of not writing a dissertation on this program I'll add some links at the bottom as to the different commands and attributes and you can do your own research. The above command however really took care of my problem. The video was converted to about the same quality as the original, no more skipping in frames, and the sound quality seemed perfect. After this I took about nine flv files and simply repeated the above process with each one.

Now that I had the flv files all converted I then used mpgtx to combine them into one video. This couldn't of been easier. I simply used the following command and mpgtx did the rest.

mpgtx -j filename1.mpg filename2.mpg filename3.mpg filename4.mpg filename5.mpg filename6.mpg -o yourOutputFilnameHere.mpg

This combined all the 5 to 15 minute clips into a 1 hour and 7 minute video. There was no reduction in quality that I noticed and overall I was very pleased with the end result of this project.

As I stated earlier I could write a dissertation on the use of these two programs. This post was not meant to be a tutorial but simply a review of the programs, the basics of how they work, and a review of the basic research I did to make the programs do what I wanted for this particular project. For more information on these programs and all they have to offer you can check out the following links.

mpgtx http://mpgtx.sourceforge.net/#Examples

ffmpeg http://howto-pages.org/ffmpeg/

The above links were the two that I found most useful. There is a ton of information all over the web about these two programs so feel free to do your own research. I plan on learning a lot more about these two programs and will probably be adding some more information and tutorials about these programs to the blog.

Tuesday, April 9, 2013

Cooking With KDE - Krecipes software review.

Like to cook ? Use KDE ? This a great application and way to keep all your recipes organized and in one place.

Taken from Productivity Monday, daily package Fedora book.

Krecipes is a KDE recipe manager. It will store, search for, and re-size recipes, rate their nutritional content, and manage shopping lists. Recipes can be stored in plan files for personal access, or in MySQL or PostgreSQL databases for shared access (or very large recipe collections). You can select recipes based on nutritional requirements or ingredients-on-hand, and you can also generate a shopping list from a group of recipes with items added or removed to suit your needs.

This is a really great GUI program to store all your recipes in one place. The program sorts everything for you, placing recipes in different categories like pasta, desserts, meat, main course, etc, etc. and even has a little thumbnail picture of what you will be cooking. If you download the U.S.D.A. nutritional database, it even breaks down all the nutritional facts of the dish your cooking, how much fat, amount of sodium, calories, and more. I thought this program was great, and here's my review.

So I downloaded the program using yum install krecipes. At the time of this writing the program was krecipes-1.0-0.2.beta2. I was a bit hesitant with it being beta but went ahead with the install anyway. Yum, found all the dependencies, downloaded the program, and installed everything with no problems. I went to application launcher and found the program in the utilities menu, click the icon and the program asked if I wanted to install the U.S.D.A. nutritional database. Why not, I clicked yes, a small progress window popped up and it took about 20 - 25 minutes for krecipes to download and configure everything. I was at work, and my work connection is pretty fast, so if you have a slow connection, this part of the install might take some time. Just a heads up on that. I have to say though, it was really worth the wait. When you get done entering the recipe, and view it in the program, Krecipes shows you the nutritional value of what you will be consuming. I thought this was a really great feature, and perfect if you're cooking for a diabetic, or someone who has to keep track of their salt and fat intake, or a calorie counter.

Entering the recipe couldn't of been easier. Everything's point and click and very easy to follow. Simply click on File, New Recipe, and a window pops up with some tabs for each category like, title, ingredients, instructions, and there's even a tab to rate it. There's even a place to add a thumbnail image of the dish you're cooking.

All the information is stored in a sqlite3 database, and if you're like me and backup everything, just click, Settings, Configure Krecipes, and there's a link to the database file. I uploaded mine to my cloud backup, and also added it to my backup files on my portable drive. Everything about this program was very easy to use. The only thing I configured myself was adding another folder in the program directory to store the thumbnail images, and that really isn't necessary but I'm a bit anal and like to keep things all in one place. You could just make a folder in your pictures directory and name it food thumbs or whatever.

All in all I thought this was a really great program. I cook for someone who has some health issues and the nutritional database is really helpful. I just can't say enough good things about this program. It was easy to install, easy to use, and if you cook and keep recipes on your computer, I strongly suggest downloading this program and giving it a try. I give this program five out of five penguins !

Find out more here, and the program is also available at sourceforge.com here.

Monday, March 25, 2013

Linux KDE FTP FileZilla


Now that I've decided to use my Linux partition on a daily basis, I needed to install some software. Last night I updated everything, and the system is running great. This morning it was time to start working. The first program I installed was FileZilla for FTP. After doing a little research, I decided to go with that program for the main reason that I'm comfortable using it. This is the same FTP program I used daily in my Windows partition. With Fedora the install was as easy as opening a terminal window and typing yum install filezilla. Yum found the program, the dependencies it needed, I typed y for yes and it was installed with no problems.

I then went to my hosts website, looked up the ftp help page, followed the instructions and was shortly ftp'ing into my account. Works just like it did in Windows, only it seems slightly faster in Linux. If you're not familiar with FileZilla you can click here for more information.

Blogger note : I'm going to be using my Linux partition on a daily basis now. I'll be trying to update the blog regularly. As I use programs, learn , and discover new ways to use Linux, I'll be adding notes. If you came across this, and need additional help with FileZilla FTP, leave a comment and I'll see if can help.